

The future of web authentication using touch / face / PIN is there!

Search for a command to run...
No comments yet. Be the first to comment.
Hello folks, I'm pleased to announce the release of the v2.0 of my WebAuthn library! This library greatly simplifies the usage of passkeys by invoking the WebAuthn protocol more conveniently. It is open source, opinionated, dependency-free and minim...

The WebAuthn protocol is more than 200 pages long, it's complex and gets constantly tweaked. Moreover, the reality of browsers and authenticators have their own quirks and deviate from the official RFC. As such, all information on the web should be t...

How the Passwordless.ID development is currently in a slump.

Hello folks! Since I have little time to cater about Passwordless.ID lately, I wanted to at publish some little update. So here we go, the WebAuthn library (to enable passwordless login using passkeys) now also delivers more information about the "au...
What I like about the banner picture above is that it is a very useful analogy to our problem at hand. A database is nothing else than a glorified electronic version of it. Lots of small storage boxes containing some data, and identified by a label o...

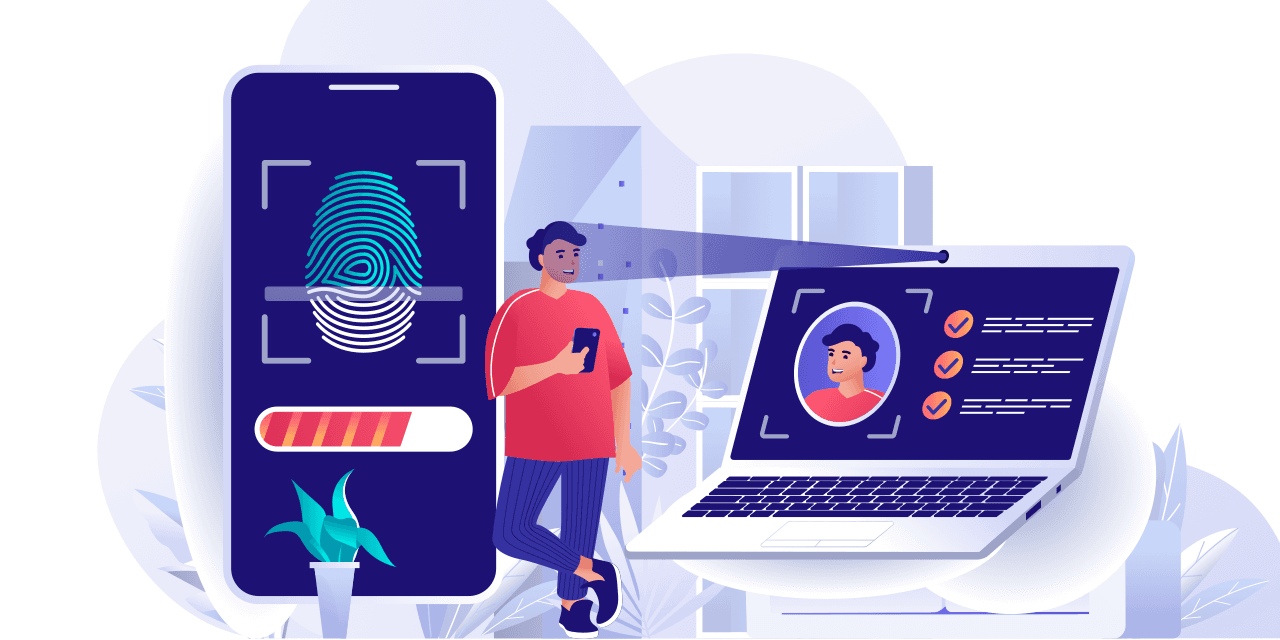
Web authentication through local device authentication like Android Touch ID, Windows Hello Face recognition or just a local device PIN code. This is now available for Browsers and offers not only a smoother user experience but is also more secure.
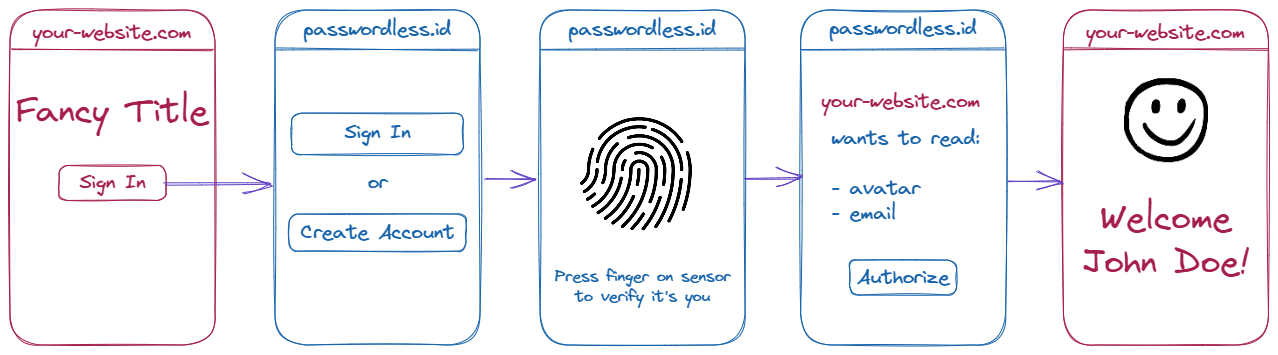
It has many names: namely "Passwordless", "WebAuthn" and "PassKeys" but they all revolve around the same. It leverages a recent browser protocol called WebAuthn which acts as a glue to invoke the local device authentication mechanism. Before going into details, let's see what it looks like (with my laptop/phone using a German locale).

Looks great, right? Do you know anyone who likes passwords? Me neither. No more passwords == better UX. All those complex password rules, not reusing them, etc. is just annoying. And in the end, you forget the password anyway and must reset it.
Getting rid of passwords makes any registration/authentication much smoother and quicker. Moreover, it has several other benefits.
It is two-factor authentication in a single step.
The first factor is something you have. The authentication only works on registered devices.
The second factor is something you are, or something you know. A biometric verification, or the device PIN code, is required.
A combination of both is required to authenticate the user.
Phishing usually involves the user typing their password into a fake website. It is the most common way to hack accounts.
By getting rid of passwords, you get rid of phishing! Great, right?
Moreover, it also protects against further security threats like password reuse, social engineering attempts and the like.
The underlying protocol relies on asymmetric cryptography. The private key is stored on the device while only the public key is known by the server. Even if the clear text data on the server is stolen, it is not sufficient to authenticate the user. The user's device platform itself must be hacked to do so.
Biometric verification uses the local authentication mechanism from your device. On the device, this biometric information is strongly protected and never exposed.
Verification is a safety measure used to prove you are you, then create or access cryptographic keys stored on your device. These keys, also known as passkeys, are in turn used for the authentication mechanism.
The user verification is delegated to your platform. If you are uncomfortable with such a mechanism, you can still use a PIN, a password, a swipe pattern configured, or whatever is configured on your device as the local authentication mechanism.
The protocol does not reveal anything about you. It just receives randomly generated key pair IDs and public keys. Moreover, each website has its own set of credentials and has no idea about the credentials used by other websites.
The authentication relies on a recent browser protocol called webauthn which is based on asymmetric cryptography.
During registration on a website, a pair of public and private keys is generated for the user. The private key is stored on the user’s device, while the public key is sent to the server.
When a user wants to authenticate themselves, they first request a challenge from the server. Then, they will reply with a message containing this challenge and signed using their private key.
The signature can lastly be verified by the server using the user’s public key obtained during registration. If the signature matches (and some other properties), the user is authenticated.
This simplified explanation of the protocol is illustrated by the following diagram.

To provide meaningful examples while avoiding the overhead of the native protocol, the following sections will make use of the @passwordless-id/webauthn library, which is a high-level wrapper around the protocol.
It can be installed via npm install @passwordless-id/webauthn or imported directly in browser module scripts using import { client } from 'https://unpkg.com/@passwordless-id/webauthn'
For registration, a cryptographic key pair must be generated for the user, it will be called a "credential" in the WebAuthn terminology. It can be created using the following call.
import { client } from '@passwordless-id/webauthn'

const registration = await client.register("MyUsername", "some-random-generated-by-server")
For further options, check out the library's docs. Once the user confirms it using biometrics or PIN code, the key pair will be created, and the function will return. The private key is stored on the device, protected by local authentication, while the public key is returned.
{
  "username": "MyUsername",
  "credential": {
    "id": "3924HhJdJMy...",
    "publicKey": "...",
    "algorithm": "ES256"
  },
  "authenticatorData": "...",
  "clientData": "..."
}
This is a plain JSON object to be sent to the server. It contains various base64url encoded data that will first have to be parsed and verified.
Since the library also handles the server side, it can be used too there.
import { server } from '@passwordless-id/webauthn'

const expected = {
    challenge: "whatever-was-randomly-generated-by-the-server",
    origin: "http://localhost:8080",
}
const registrationParsed = await server.verifyRegistration(registration, expected)
Either this operation fails and throws an Error, or the verification is successful and returns the parsed registration. Example result:
{
  "username": "Arnaud",
  "credential": {
    "id": "3924HhJdJMy...",
    "publicKey": "...",
    "algorithm": "ES256"
  },
  "authenticator": {
    ...
    "name": "Windows Hello Hardware Authenticator"
  },
  ...
}
The registration is now considered complete.
What must be stored server side is:
The credential (id, publicKey, algorithm)
Associate the credential.id to the user
When the user wants to authenticate later, you will need the public key and algorithm to verify the signature. It is imperative to store it. In contrast, the authenticator part is optional. It delivers information about the authenticating device and is not verified.
When a user wants to authenticate themselves, they must sign a random "challenge" using their private key. This signature is sent to the server, which verifies it using the user's public key.
import { client } from 'webauthn'

const authentication = await webauthn.authenticate(["allowed-credential-id", "other-allowed-credential-id"], "random-server-challenge")
Again, for all the available options, just consult the library's documentation. Once the user confirms the authentication attempt through biometric or PIN verification, the method returns the result.
{
  "credentialId": "3924HhJdJMy...",
  "authenticatorData": "...",
  "clientData": "...",
  "signature": "..."
}
Unlike the registration, there is no credential object, just the credentialId. This JSON can be sent as it is to the server.
Please note that the username is not present. It is not part of the WebAuthn authentication protocol. Therefore, a mapping credentialId -> username might be particularly useful to maintain server side. Alternatively, inject username in the JSON object before sending it.
The most important parts now are to:
Verify the challenge
Verify the signature
Validate a few more "details"
Given the credentialId, the server should possess the corresponding publicKey and algorithm used. These will be needed to verify the signature. The authentication verification procedure can be done with a single call.
import { server } from '@passwordless-id/webauthn'

// obtained from database by looking up `authentication.credentialId`
const credentialKey = {
    id: "3924HhJdJMy...",
    publicKey: "...",
    algorithm: "ES256"
}

const expected = {
    challenge: "whatever-was-generated-server-side",
    origin: "http://localhost:8080",
    userVerified: true,
    counter: 0
}
Again, consult the documentation for all parameters. For example, a function predicate can be used for challenge and origin to make the verification more dynamic.
const authenticationParsed = await server.verifyAuthentication(authentication, credentialKey, expected)
Either this operation fails and throws an Error, or the verification is successful and returns the parsed authentication payload.
Please note that this parsed result authenticationParsed has no real use. It is solely returned for the sake of completeness. The verifyAuthentication already verifies the payload, including the signature.
While it looks like an easy replacement for password based authentication. A bit more thought should be put into it.
Unlike traditional authentication systems that can be accessed from anywhere using a single password, authentication here is device bound. Losing a device means losing the private key used to sign in.
That the authentication is device bound affects many aspects of the user authentication:
anonymous "usernameless" authentication becomes possible (where each device is its own account)
by default, relying on a single registered device also implies losing access completely if the device is lost/broken/stolen
registering multiple devices and being able to modify the list of allowed devices should be considered
more diverse account recovery options become possible, like through another registered device
Taking care of all these aspects should not be underestimated. Especially if the goal is to replace traditional password based user authentication in an existing system.
Passwordless authentication comes with its fair share of complexity and gotchas. "Passwordless.ID" aims to solve this by being a "free public identity provider".
Its philosophy is simple.
Make the web a safer place
Make it easier for developers
More comfort and control for users
This is achieved by providing tools and services to delegate the authentication to the Passwordless.ID API.
Passwordless.ID is compatible with both OAuth2 and OpenID protocols. That way, you can use it as a generic OpenID provider for a "Sign in with..." button.
If you are familiar with OAuth, you probably know that it is an "authorization" protocol. Usually, the API also offers a set of operations to grant permission to. In the case of Passwordless.ID, the only operation is accessing (part of) the user profile.
If you want to add Passwordless.ID as an additional social login provider using some predefined library, check out our OAuth2/OpenID guide!
For a straightforward and smooth integration, you can use the @passwordless-id/connect library. This library makes it possible to trigger the authentication/authorization using a single call.
Check out the standalone demo to try it out and the user guide for implementing this on your site in 5 minutes! Not even an account is necessary!
Why would you need to register your profile information, portrait, address over and over for every website or app? It is simply annoying for everyone. Using this shared profile, any website or app can request read access to it. That way, the user has a single place to maintain the profile up to date.
The same goes for the list of authorized devices. It simply makes more sense to maintain it in one place.
Passwordless.ID is free for everyone and forever without a catch. It is our conviction that making it publicly available is the best way to make the internet a safer place as a whole.
To keep it striving in the long term, some funding is crucial. We would love to find some sponsors. If you are interested, please contact us or just drop a comment here.
Using Passwordless.ID, the privacy and security settings will be in the hands of the users instead of the websites and apps. The users will choose whether they stay logged in or not, what account recovery mechanisms they deem safe enough, what information they agree to share without explicit consent, and so on.
In particular, the last point is interesting. For example, a user might agree to share its nickname and portrait publicly. That way, any website could show its avatar in the corner without explicit authorization request beforehand.
Passwordless.ID is not yet "finished". It is currently at the early proof of concept stage.
Although it lacks capabilities, it can already be used for testing and integration purposes. However, please note that the database might be reset at any point in the future until further notice.
This was made with love, sweat and considerate thoughts. We strive to make the best possible authentication experience and are glad to hear any feedback. Even a little "like" on this article is encouraging.
This is meant to be a public identity provider. Help us make the web a better and safer place while making your developer's life easier. The best way is to use it. If you need help, just post an issue. And if you already integrated it, we would be glad to feature you in a future blog article!
In case you plan to write a blog article, a tutorial, some news or anything alike, we would be glad to hear from you. Here are some logos and banners if you want. We might feature it on our blog too!
If you like it too, talk about it to others! Share it with someone! Every little act is of helps make it succeed. Thank you!
Some further links: